I recently submitted a pull request to an open source project, and Jearvon asked about the how, and I thought this might make a good blog post, for my approach to contributing to open source (but YMMV, and all those disclaimers).
The problem I find with being a first-time contributor to a project is that at each stage, there’s a failure mode. If you make it through all the steps, you’ll have contributed to an open source project 🙂
1. Finding a project
How do you even find projects?
My latest flow has been that whenever I hear of something interesting (from a talk, from Slack, from an email), I star it on GitHub. And when I find the mood to go contribute to something, I’ll go through my stars.
If I REALLY want to contribute to something, I’ll change my status to “watching” so I’ll get emails all the time, which hopefully reminds me to look at issues every so often to try and find something.

This flow is limited to GitHub projects, unfortunately, and I haven’t adopted a solid bookmarking strategy anywhere else to use instead. That said, a whole LOT of open source projects are hosted on GitHub.
Possible Failure Mode: There’s nothing anywhere in coding world that interests you. At this stage, you’re just looking for projects that you’re intrigued by, and then you’ll see if you can help out.
2. Get it running
Get the project running on your own machine.
Fork the project! Clone it to your machine! Read the README! Venture into the land of yak-shaving and dependency hell!
Failure Mode: Irreconcilable dependency issues, or you just decide you’d rather find something else easier to start up because you’re working with new languages or new build systems or just augh things that are too complicated to bother with while offering your free help.
A solution to this failure mode is going into the equivilent of devops-land and working with the project to make it easier for new people to start up. But if you (like me) don’t care that much about that for a new-to-you project, it’s a failure mode.
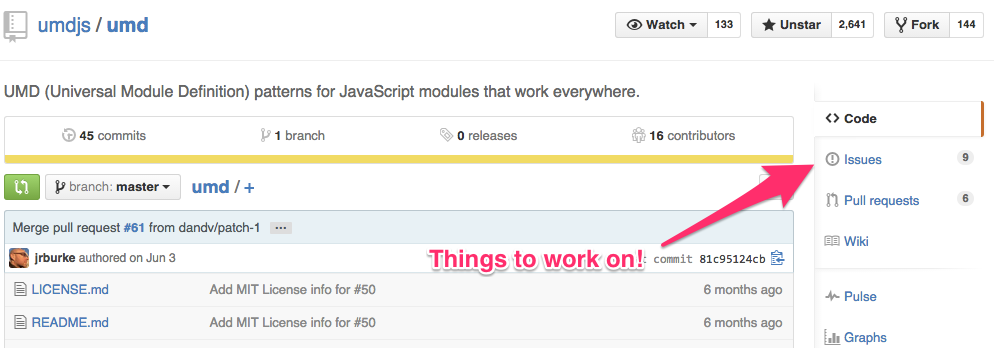
3. Finding something to work on
You’ve managed to get the project running on your own machine. This is no small feat. The next step is to find something to work on.
First, I go to the issues area of the project.
Not all projects track their things-to-do in issues, but it’s the first place I check. If they don’t use issues, they’ll (hopefully) have a link to their bug tracker in the README for the project. Use the labels to filter if there are lots of issues (using, for example, the “bug” label to find things that may be smaller).
Possible Failure Mode: No issues, or the only issues are things that have lots of comments on them (pending fixes, blocked by something else).
A recovery mode for this issue would be to talk to the maintainers on their IRC (if they have one) or chat (such as gitter) and say you’re interested in helping.
Because maintainers are often developers and not necessarily project managers, you’ll often get an answer like “uh, update the docs?” or “find areas that are untested and test them?” instead of something you know, to fix. If you like updating docs and writing tests for not-your-project, it can be a recovery mode, but for me, that’s often a fail, since writing tests and docs on a project I’m unfamiliar with is not my cup of tea.
4. Fix something
You found something to work on, it seems to be within your capabilities, and gosh darn it, you just might know how to fix is. This is AWESOME to reach this step, so all the high-fives. It’s not over yet, but you’re doing well.
Failure Mode: The thing-that-looked-fixable isn’t so fixable. 🙁
There is a mild recovery from this, in that you can give your results/attempts back to the issue in the form of a comment to help the next weary developer who stumbles upon it. But sadly, you won’t have committed code to the project (that is, unless your comment generates a discussion leading to a solution. It’s possible!).
5. How to even contribute
Check for a CONTRIBUTING.md (or in Django’s case, a .rst. Just look for all caps).
If that exists, it hopefully has all the things you want to know in it (or links to a page with all and more for you to know). In general though, a pretty unobjectionable flow is like so:
- You are working on your own fork
- You have created a branch SPECIFIC to the thing you are fixing
- You fix the thing, and mention the issue you’re resolving in your well-written commit
- (really 3a) Your fixed thing should have tests and the test suite should pass
- You push your branch to your fork
- Open a pull request to the main project, and I generally put some note about “new here!” and ask for feedback.
- You will get feedback, so actually respond to it and update your PR
- Maybe you’re merged?
Failure Mode: Cynical me says the failure mode for this is mean maintainers (not uncommon enough) who take issue with your contributing style. If you didn’t read the CONTRIBUTING.md doc (if it exists), that’s on you, though.
You can also fail if your solution doesn’t pass tests (but it did on your machine! *facepalm*), if the project goes with another solution to the issue (hooray for the project! a little trip to bummertown for you), or the project can’t merge your issue because of some blocker (such as an upcoming release). But if you make it past step 5, you’ll have a PR merged to an open source project 🙂
Want more tips?
The absolutely FANTASTIC OpenHatch Foundation has a whole SLEW of things to help you out.
The steps in this post assume things like being well-versed in finding/hearing about projects, being good with git, etc. OpenHatch helps out with those, and the website itself (Django) is open source and is a great project to contribute to. They also run trainings and events, so look to see if they’re coming your way.
I’ll also say that these tips are specific to finding/contributing to projects remotely. If you can work on an open source project where you actually know a real-life-person, your chances of making it past the failure modes is much greater (and even better if there are regular meetups for you to show up and help/ask for help). For many cities, I suggest checking out your local Code for America Brigade to find local, interesting projects to contribute to.
Up for Grabs is a site with “shovel-ready” open source issues that are just dying for a pull request. That’s how I got more involved. To be fair, some issues are definitely not for beginners (Rosyln compiler anyone?) but some of them would be a great place for people looking to get their start: http://up-for-grabs.net/#/
Starring projects doesn’t work for me… I have currently +800 starred projects on GitHub. Instead, I usually create a new card for the project on Trello, in my board.
The tip I can share with people that are really afraid to start contributing, that think they cannot add anything of value on top of really good projects is: start by adding/improving documentation! Everyone knows writing documentation is a task virtually nobody enjoys, but we all know how vital it is for a project adoption. Writing documentation & examples for a project is one of the best ways to learn and to give back to the community.